The goal of this post is to evolve the pinch valve I built (discussed in this post). I’ll start with the results.
Results
Below is an image I took as we tested the new pinch valve. The other image is a close up of the enclosure when the arm is in the closed position:


 FAIL! Water still flowed through the tube.
Venturi Effect
 And then there is science…
While I failed with this attempt, I did become familiar with the Venturi effect…something we all probably learned about at some point in school…I don’t remember.
Here is a Kahn Academy video that helped me get a clue what the Venturi effect is all about:
The exciting thing I learned was using “the Venturi” method instead of an air stone/air pump to add oxygen into a tank of nutrients.
Here is Rob Bob’s video:
Here is mediamaker2000’s riff on Rob’s:
Ooh!!! Science over $$$!! Take THAT to those that insist on the Dakota Access Pipeline…#NoDAPL
Take 2 Build
This go around I’m starting with:
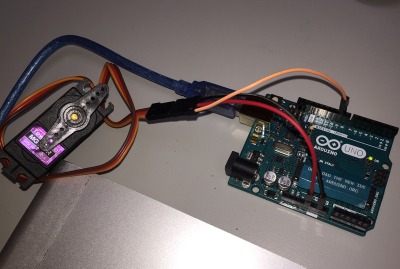
- a beefier, metal gear servo motor that I got off Amazon.com. Ooh – neato. I get two!

- a Fusion 360 model of this servo motor I am using that I got on from the Fusion 360 Gallery. The easiest way to make an enclosure is to fit it around the part to be enclosed. While a .stl file works fine, I like starting with a F360 file so that I can more easily modify dimensions when the designer created a parametric model.

- Trying out the Servo motor with the test I used last time (GitHub location). This lets me know which way to orient the model. Doing so makes shaping the enclosure easier than last time. Easy peasy since the wiring is the same as it was for take 1.

After evolving the enclosure and arm (about two days worth of design/prototype/fit), I was able to test….
On To Take 3
While I got closer, I failed. For take 3 I’m going to design a new way to pinch. One that is more like what is shown in the image from this document:


Good morning! I believe your valving problem is due to the stiffness (Shore Hardness) of the tubing you are pinching with your servo motor mechanism … the tubing is too stiff for the amount of available torque available.
You could try a shorter arm on the servo (increases the available torque), use soft latex (surgical) tubing [ https://www.mcmaster.com/#latex-tubing/=17pgkxn ], or use a peristaltic dosing pump to dispense a known amount of liquid [ https://www.ebay.com/p/?iid=171869343196&&&chn=ps ]. With the DC peristaltic pump, you can use PWM to drive the pump motor in high-torque, low speed to very accurately control the fluid transfer … or you could simply use a sensor to indicate when the test tube (or other chamber … more thoughts on that later) is filled correctly. Oh … a windshield washer pump and reservoir is a more expensive, yet off-the-shelf solution (pardon the pun, please). However, having five of them would take a bit of room.
Regarding your test chamber/test tube assembly … take a block of HDPE (high density polyethylene, say 1″ x 7″ x 5″, drill 5 (or more) round-bottom holes part way through, and then mount this drilled block on pivots, so you can use your existing servo to dump the contents into a waste pan after you calibrate. The round bottom hole can be created with a 1/2″ box core router bit (woodworking tools are very compatible with HDPE). HDPE is pretty insensitive to most of the chemicals you’ll be comfortable working around, is rated food-safe (FDA), and is inexpensive.The round bottom prevents gunk (highly technical term) from collecting in the crevice a flat-bottomed hole would provide.
When sampling your nutrient solution, you can tilt the test chamber 45°, have a channel milled on the side of the test chamber to route the nutrient solution back into the reservoir until you have flushed the tubing and have a good sample available. Stop the pump, rotate the test chamber vertically, and then fill, test, and dump (in this case you can choose to dump the tested nutrient solution back into the reservoir (slight risk of contaminating your nutrient solution), or dumping it directly into the waste pan (slight volume loss, but absolutely safest for the customers.
Hope this helps … I enjoy following your thought processes, watching you work around issues, and find your writing style extremely readable. Please continue to share.
Regards,
Rick
Thank you VERY much Rick. I created a blog post where I went deeper into your comments so I won’t belabor thoughts here. I truly appreciate the time you took to help me out.
Glad to help!